db's CamTag — Help Guide
Tag once. Rename, package, and push your shoots everywhere.
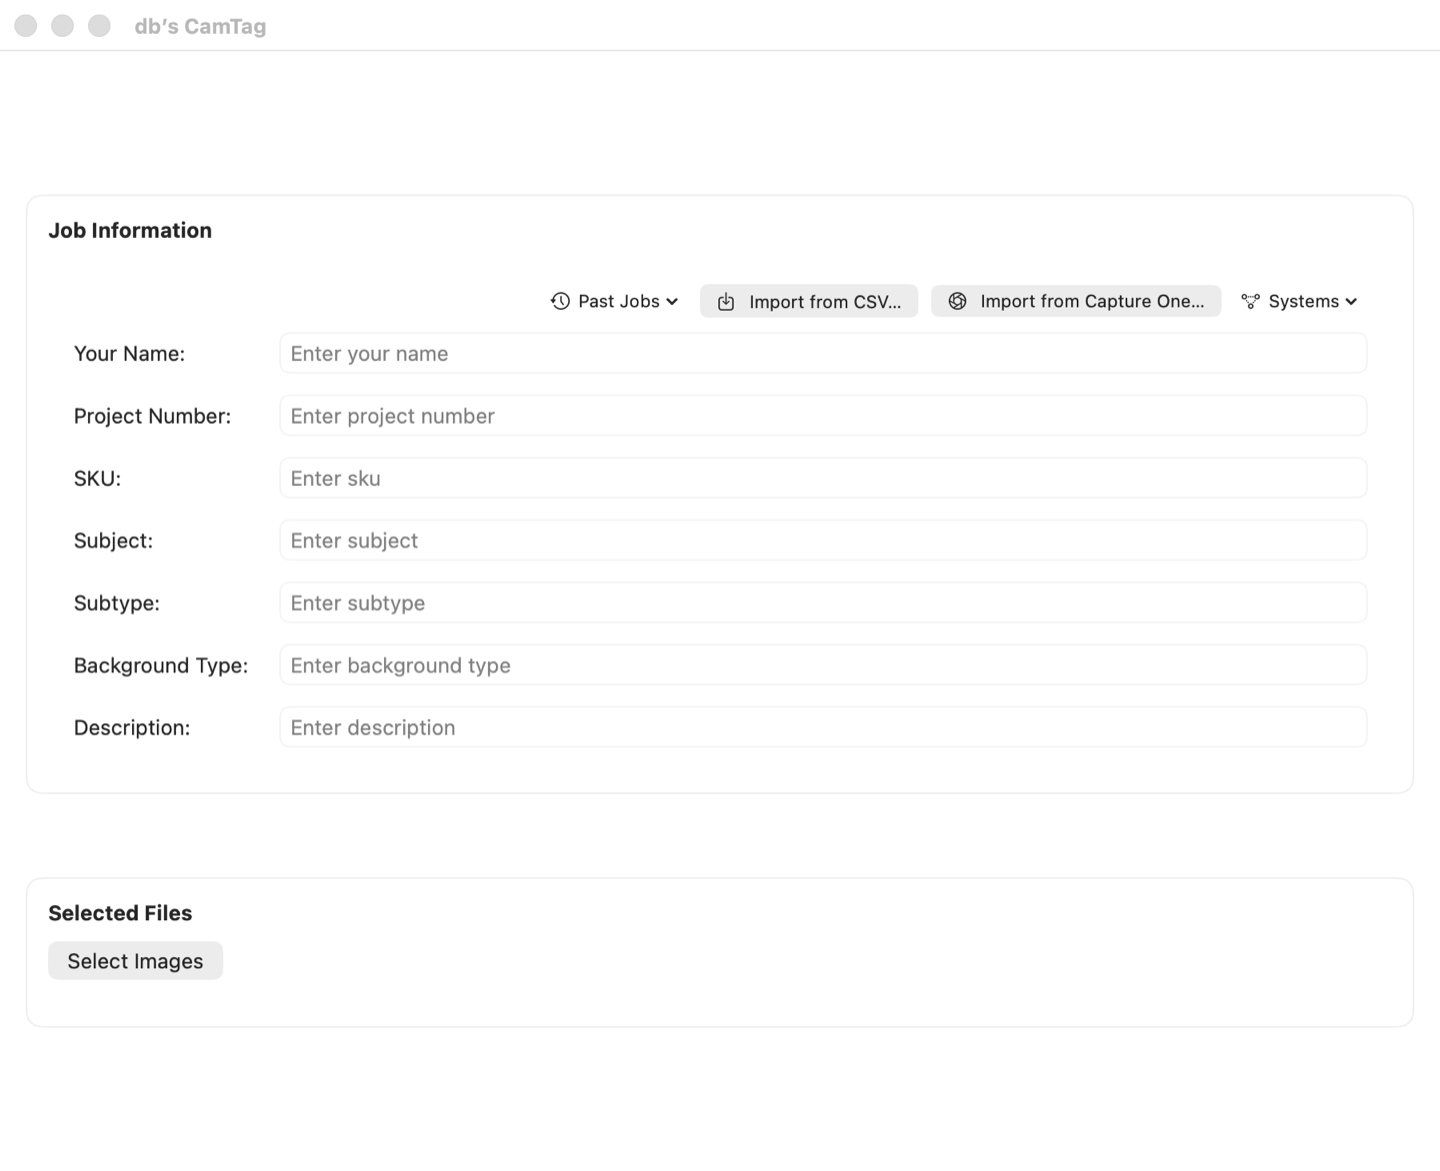
db's CamTag is a Mac app for photographers. You shoot a session; CamTag turns the pile of files into a delivery — every file renamed to your studio's pattern, tagged with the job's metadata, copied (or converted) into a clean output folder, and, if you've connected your systems, uploaded to your Iconik library and announced to your project tools automatically. The main window has two parts: Job Information (the details of this shoot) and Selected Files (the photos and videos you're processing). This same guide is built into the app: choose Help, then db's CamTag Help.
Your first shoot, start to finish
1. Select your files. Click Select Images and choose your photos and videos. JPEG, TIFF, PNG, HEIC, camera RAW, MOV, MP4, MXF, BRAW, R3D and more are supported. Thumbnails appear below — click the X on any file to change your mind about it.
2. Fill in the Job Information. Type into the fields, pick from the drop-down menus, or import everything at once from a CSV. Empty fields are simply left out — nothing is required.
Let the Mac write the description: click the ✨ button beside the Description field and CamTag looks at your selected photos and videos entirely on your Mac (nothing is uploaded), then fills in only what they all have in common. One file’s unique subject never speaks for the whole batch. Videos count too — CamTag checks a few frames from each clip. To describe just part of the shoot, click thumbnails to highlight a group first; the suggestion then uses only those files.
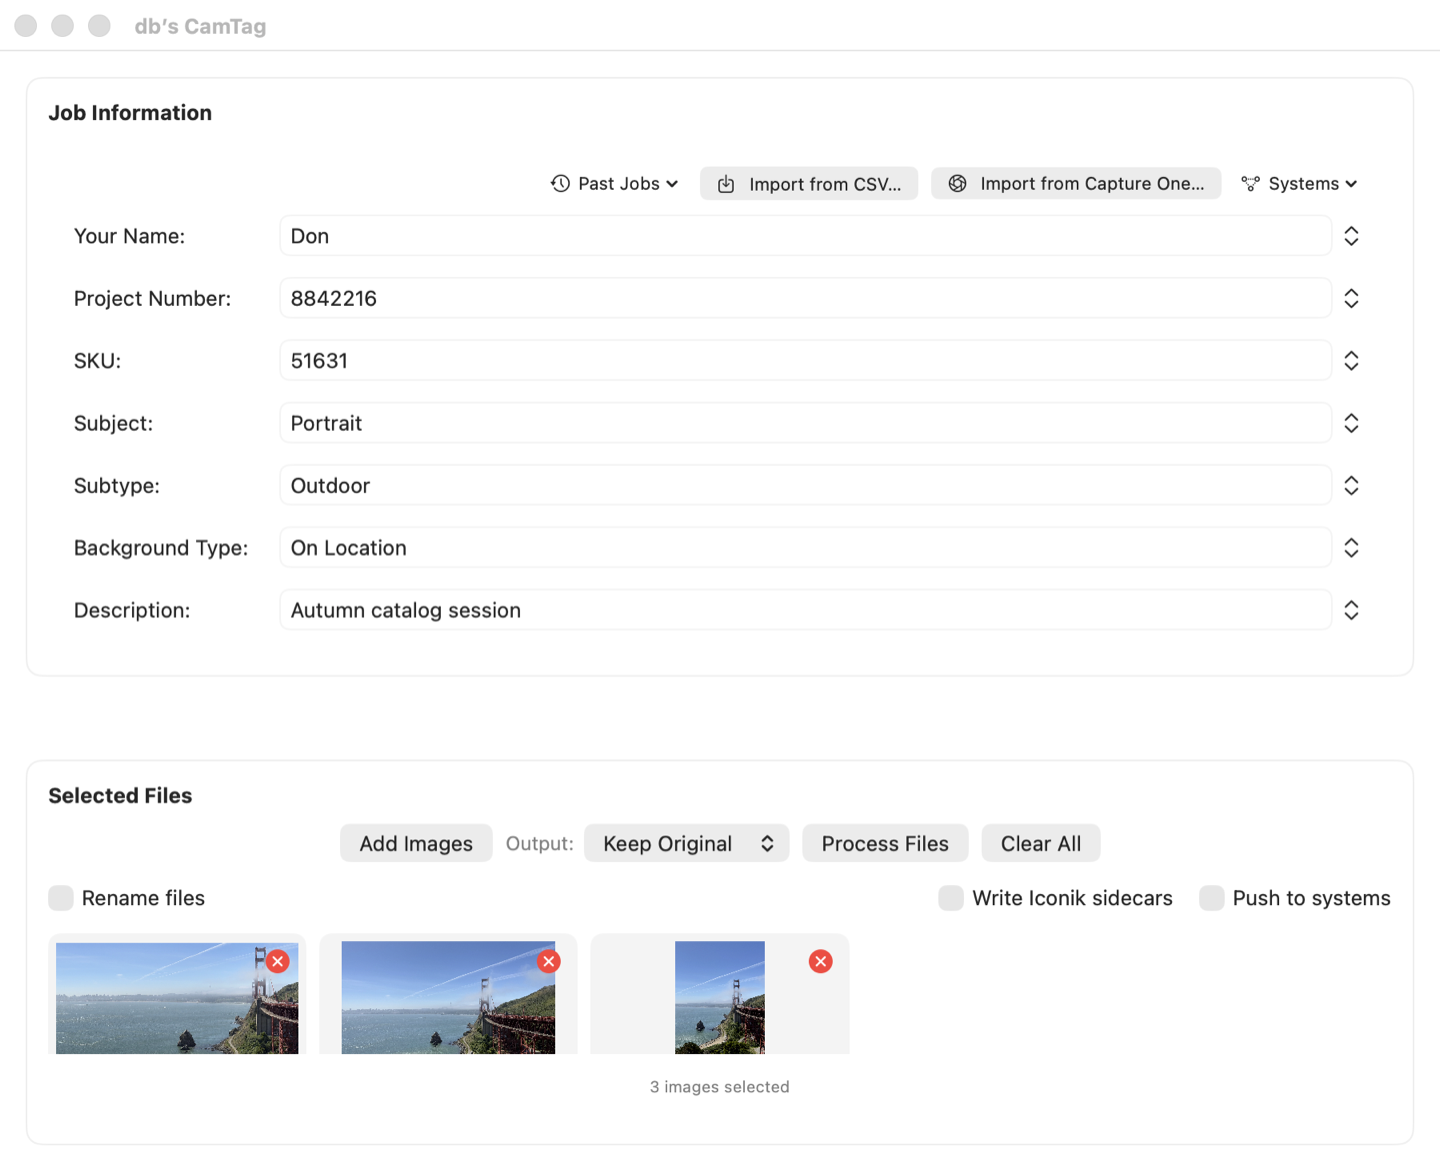
3. Choose your output. Pick a format: Keep Original, or convert stills to JPEG, TIFF, or PNG. Videos always pass through untouched, and camera EXIF data is preserved when converting.
4. Turn on what you need. Rename files renames each file with a live preview, and numbering stays sortable even past 1,000 files. Write Iconik sidecars adds a .json metadata file next to each image for storage-gateway ingest. Push to systems uploads to Iconik and notifies your other connected systems after processing.
5. Click Process Files and choose a destination folder. CamTag copies, converts, and renames everything there, writes a job manifest, and — with Push on — delivers to your systems. A summary tells you exactly what happened, including a result line per connected system.
Tip: processed jobs are saved to Past Jobs automatically. Next time, type the job number and CamTag offers to fill the rest of the form.
New in 1.1 — see more of your shoot at once
Select more than 4 files and the thumbnail grid switches to a compact list, so the whole shoot fits on screen. Each row shows a little thumbnail and the filename — roll the mouse over a row and a larger preview appears beside the list. Click a row to highlight it (highlights drive the ✨ suggestion and bulk edits), and hover to reveal its edit and remove buttons.
Different details for different files: double-click any file — a row in the list or a thumbnail in the grid — to give that one file its own metadata. Or highlight several rows and click Edit N Selected… to change them all at once; a field showing "Multiple values" means the files currently disagree — leave it alone and each file keeps its own. Files with their own details get an orange ✎ badge, and those values are used everywhere the job's are: renamed filenames, Iconik sidecars, the job manifest, and uploads to your systems. Reset to Job Values undoes it any time.
Importing a CSV — jobs and pick-lists
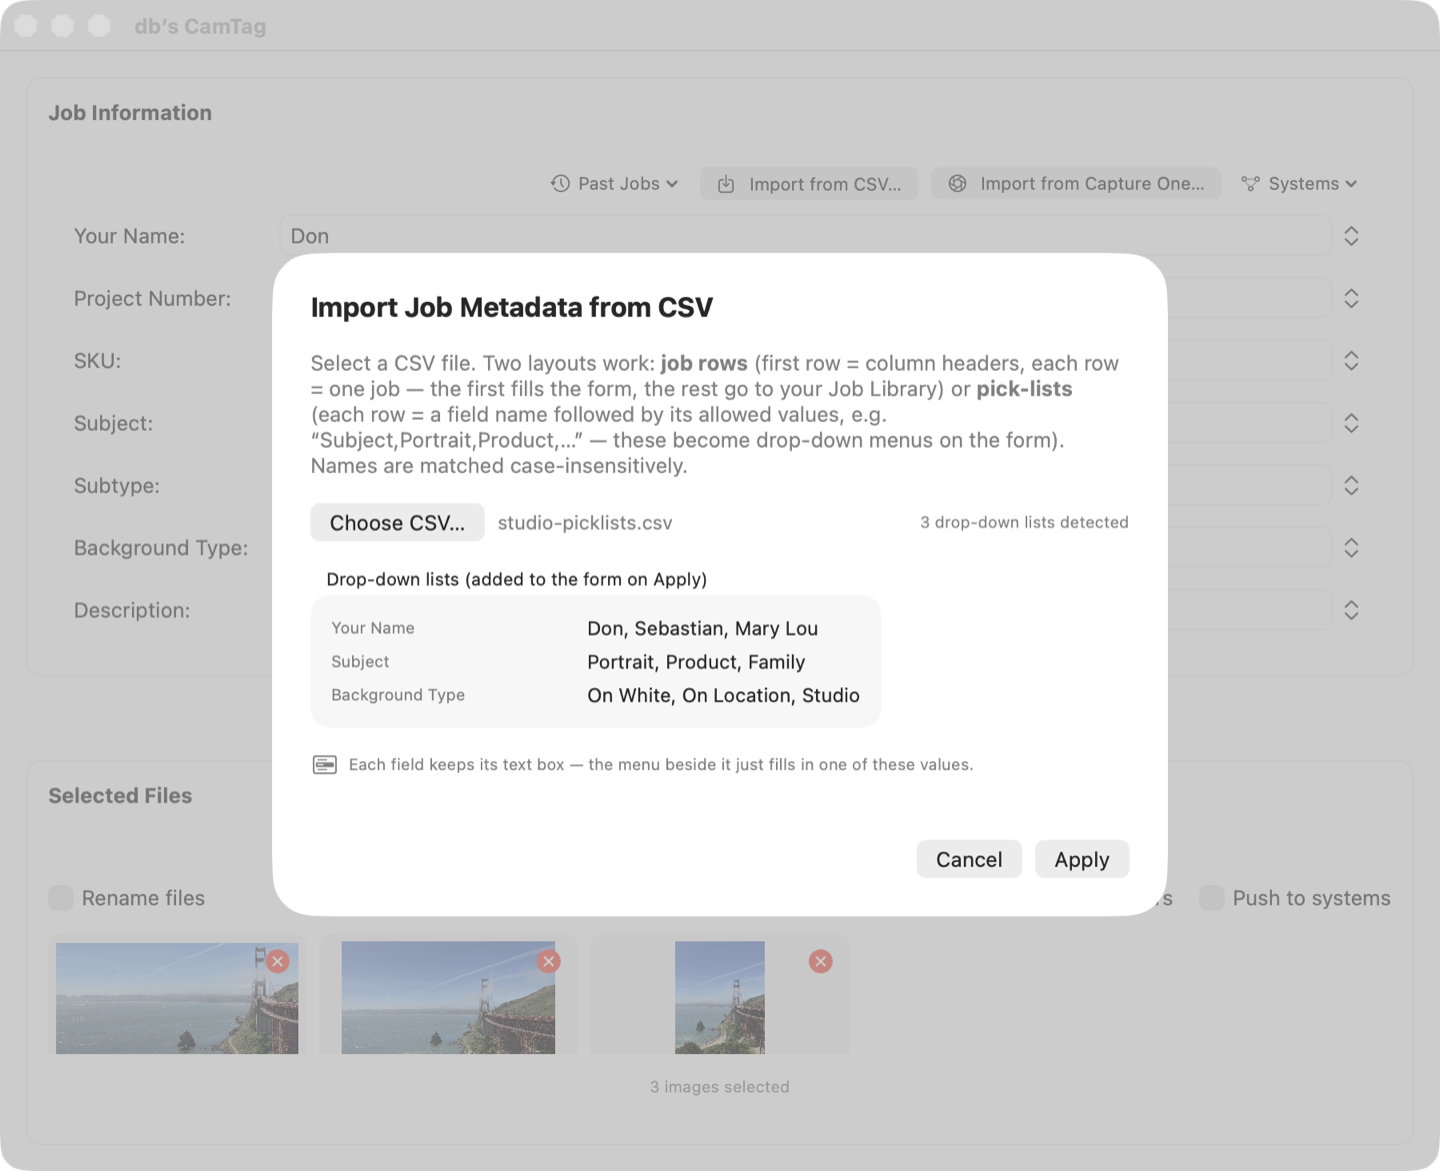
Click Import from CSV. CamTag reads two kinds of files and figures out which you gave it. Job rows: the classic spreadsheet — first row is column headers (Project Number, SKU, Subject...), each following row is one job. The first row fills the form immediately; every other row is saved to your Job Library for later. Column names are matched loosely — "job number", "WF#", "project" and similar all land in the right place. Pick-lists: a row per field, listing that field's allowed values, like Name,Don,Sebastian,Mary Lou. These become drop-down menus beside the matching form fields — your studio's standard values, one click away, spelled consistently every time. Re-importing a pick-list CSV replaces those menus wholesale — the CSV stays the master copy.
Drop-down menus that learn
Any field with saved values shows a chevron at its right edge. The text box always works — menus never get in your way. Pick a value: click the chevron and choose. Add what you typed: type something new, click the chevron, and the top item reads Add "..." to this menu. Let it learn: when you process a job, hand-typed values in fields that already have menus join those menus automatically. (Job numbers and descriptions are left alone — they're unique per job.)
Renaming fields to match your studio
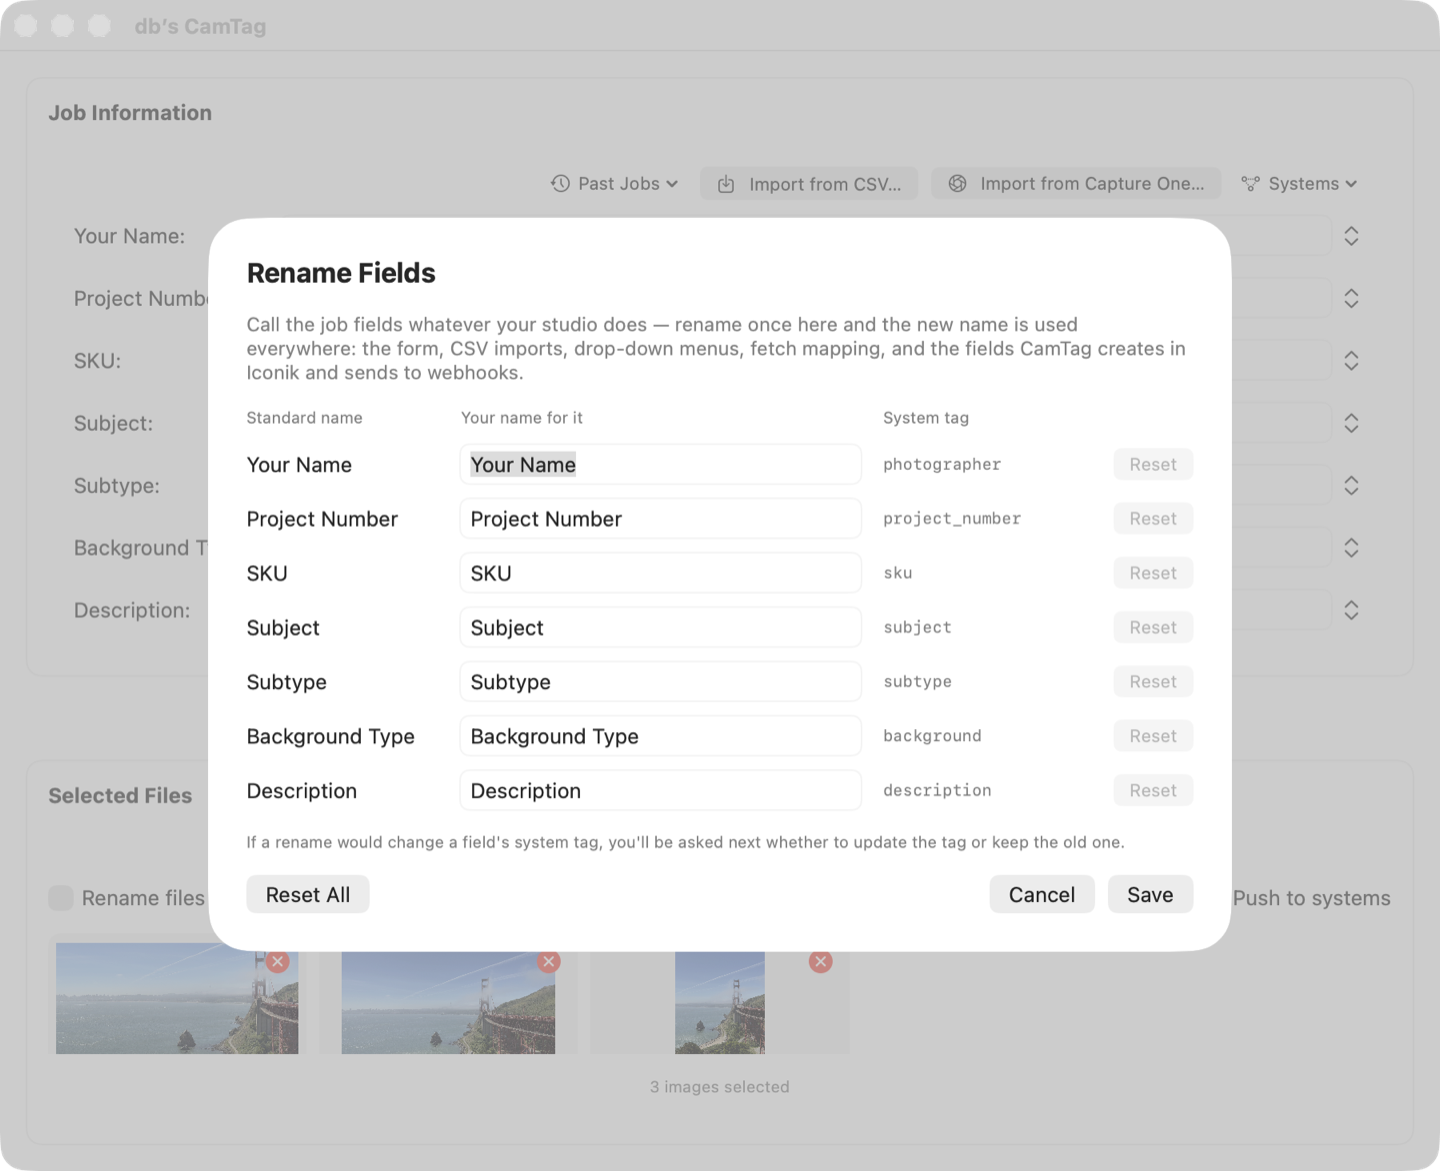
Maybe "Subject" should be "Product Line", or "Project Number" is "PO Number" where you work. Open Systems, then Rename Fields, type your names, and Save. The new name follows through everything: the form, CSV matching, drop-downs, fetch mapping, your filenames, webhooks, and the metadata fields CamTag creates in Iconik. If a rename would change a field's system tag (the project_number-style name used in Iconik and webhooks), CamTag asks whether to update the tag or keep the old one — keeping it means your existing Iconik fields keep filling under the old name, with the new label shown only in the app.
Connecting Iconik, Workfront, Monday.com and more
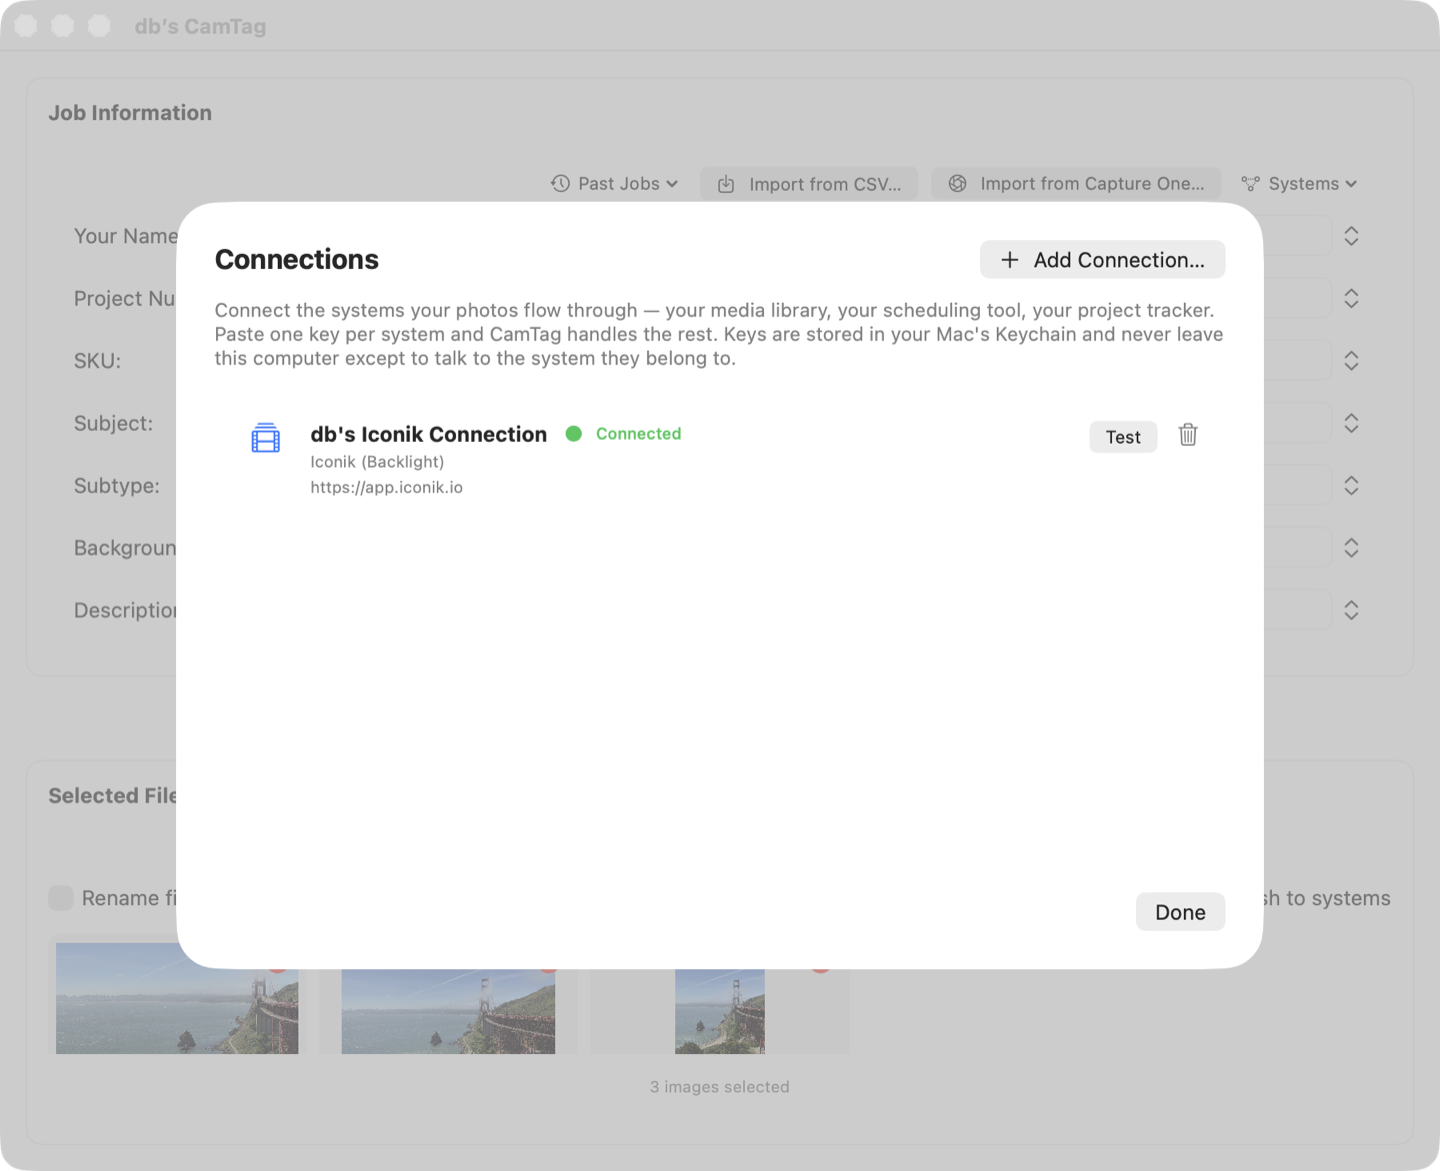
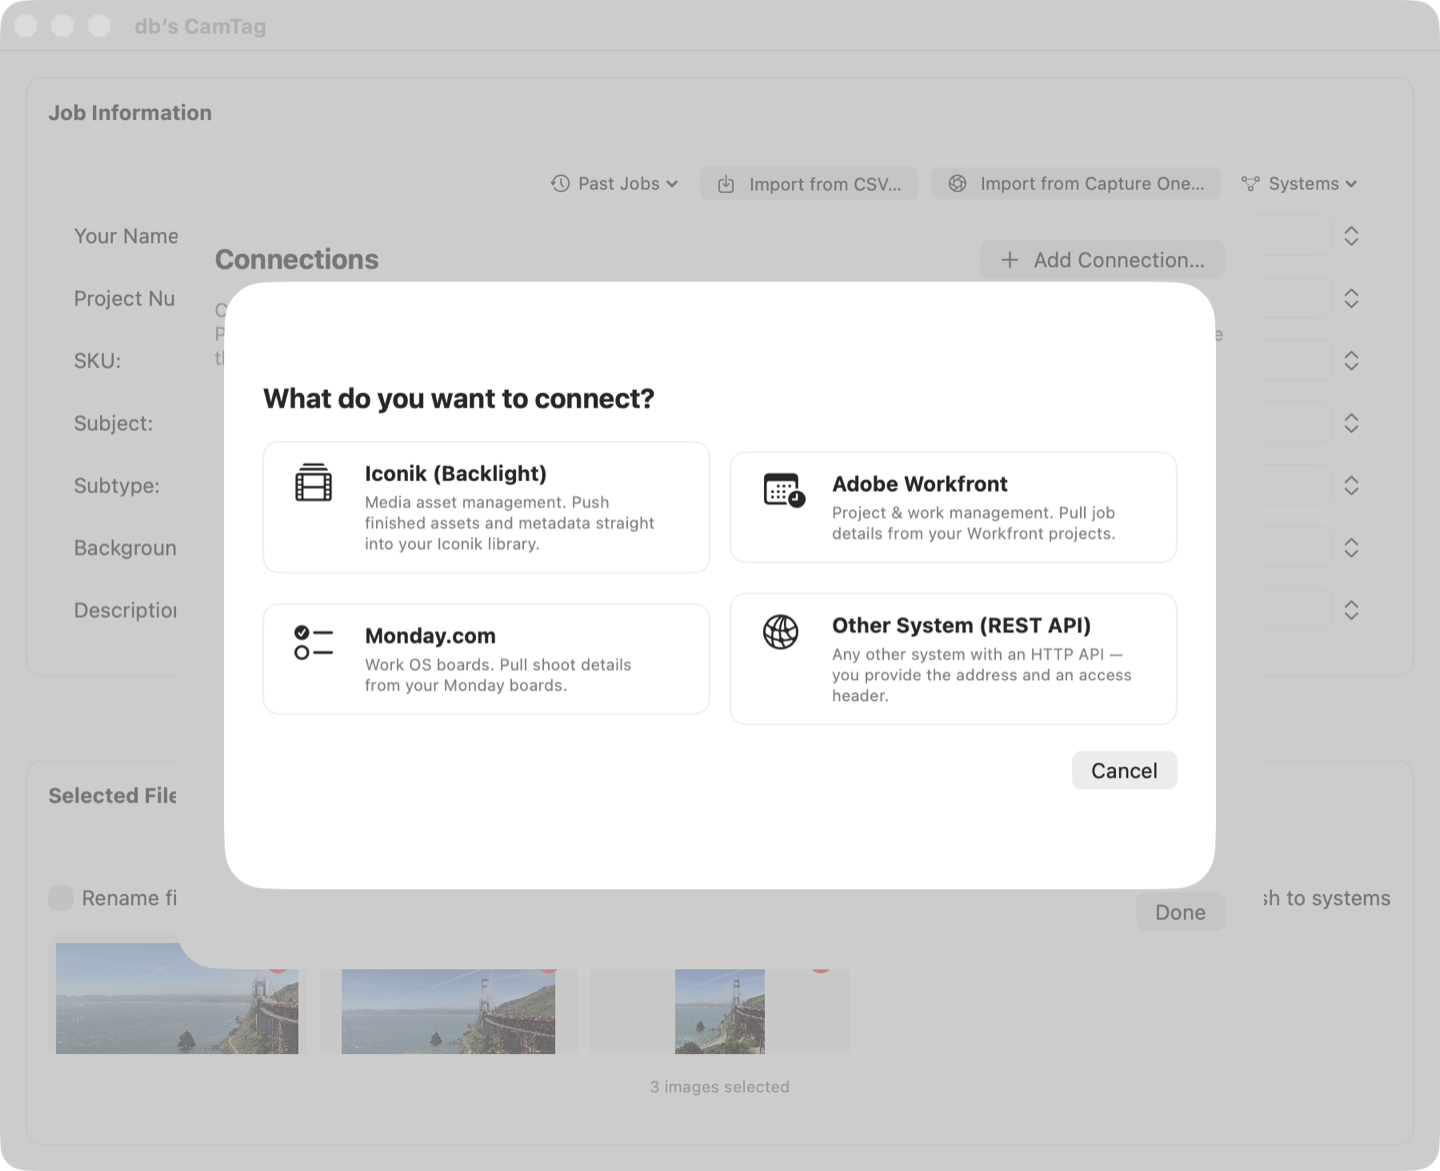
Open Systems, then Connections, and click Add Connection. 1. Choose the system: Iconik (media library), Adobe Workfront or Monday.com (job details in, delivery notes out), or Other System — any tool that accepts an HTTP webhook. 2. Paste your key. The form tells you exactly where to find the API key in that system's own settings. The key is yours, from your own account. 3. Click Test. A green Connected means you're in business. Save. Once connected, Fetch looks up a job in Workfront, Monday, or Iconik and pulls its details straight into the form — save your field mapping as a Route and it applies automatically next time. With Push to systems on, files and metadata upload to Iconik, delivery notes post to the linked Workfront project or Monday item, and webhooks receive the full job manifest.
What happens in Iconik
With an Iconik connection and Push on, every Process run does the complete ingest for you. It checks your Iconik account and creates any missing metadata fields CamTag writes. It creates (or updates) a Metadata View named CamTag that displays exactly your current fields. It uploads each file as a new asset, applies your metadata, and starts preview generation — thumbnails appear a minute or two after processing. And it remembers every uploaded file: re-process the same photos and CamTag refreshes their metadata instead of creating duplicates. Tip: in Iconik, open any asset and choose the CamTag view in the metadata panel to see your fields.
Past Jobs — your job library
Every processed job and every imported CSV row lands in your library. Three ways back in: type the job number in the form (a Fill from saved button appears), use the Past Jobs menu above the form, or choose Browse Library in that menu to search everything.
Privacy
CamTag collects nothing. There's no account, no analytics, and no server of ours. API keys are stored only in your Mac's Keychain, encrypted by macOS, and used solely to talk to the system they belong to. If you never add a connection, the app never touches the network. Full policy: thebrownings.net/camtagprivacy.
Troubleshooting
My files uploaded to Iconik but I don't see the metadata. Open the asset and switch the metadata panel to the CamTag view — Iconik only displays fields through a view. CamTag maintains that view for you; if your account key lacks admin rights, the processing summary says exactly what to ask your Iconik admin for.
Iconik shows a gray placeholder instead of my image. Previews are generated by Iconik after upload — give it a minute or two and refresh. If they never appear, your app token may need the "create transcode jobs" permission; the processing summary will tell you.
My CSV imported as one giant job or wasn't recognized. Check the first row: job CSVs need column headers there; pick-list CSVs need a field name at the start of every row. Both Excel and Numbers exports work fine.
I renamed a field and my old CSV stopped matching. It didn't — standard names and common aliases keep working forever. But your new name always wins if both appear.
Something else? Email vidbeo@gmail.com — real answers from the actual developer.